Tuesday 14 October 2014

Blog Hop for Oyster Paper Crafts

Hello Peeps

Firstly thank you for stopping by.

And haven't the ladies done well some lovely work done.

Today I have three tags which are part of the Oyster Papercrafts blog hop which all the design team are taking part in.

The brief that we got was "tags" so basically we could do what we want but with products sold by oyster paper crafts naturally. The blog hop started last Friday and in case you have missed any of them I would recommend you go and visit the blogs.

There is also two goody bags up for grabs if you leave a comment on each blog.

Also all the products are Available from Oyster Stamps link here:

http://www.oysterstamps.co.uk/


Neet          10th October                      http://www.hickydorums.blogspot.co.uk/
Pam          11th October                      http://pam-simcrafts.blogspot.co.uk/
Martine     12th October                      http://abfabdesigns.blogspot.co.uk/
Hellen       13th October                      http://www.elliescupboard.blogspot.co.uk/
Margot    14th October                        http://margot-craftcorner.blogspot.co.uk/
Andy      15th October                          http://www.andrewbennett17.blogspot.co.uk/
Eileen     16th October                           http://eileenscraftyzone.blogspot.co.uk/
Kerry     17th October                           http://kerryscraft.com/


As you can see I have furnished you with the blog addresses for you to visit.
 
My Tags
 
I ended up doing three basically I could not make up my mind.
 
First of I made my own tags the reason being (as will come apparent later) is you can make the tag any size you want.
 
I cut the card 6"x 3",  place the short edge up into the gift box punch board.


Make sure you put all the way to the top as far as it will go. Punch


Remove and first side is done.


Flip it over and do the other side


One tag


With your screw punch add hole. Your tag is now complete. Simples


As I say the reason I went down this route was because I can make the tag any size I want.
 
Tag 1


Ok I decided on this because of the Ryn Tanaka Stamps being stocked at Oyster.
I took three Distress inks pads ( Mowed Lawn Salty Ocean, and Peacock Feathers) and took then directly to a acrylic block, sprayed with water then on to card stock. Removed block and added salt crystals, so yes I did rock salt technique for the background.
Stamped fish twice once on the tag,  and second on to card , coloured it in using alcohol pens, then gave it three coats of glaze with clear embossing powder.
Stamped the seaweed in Versafine majestic blue on the tag and the bubbles in momento tuxedo black.
I highlighted the top and bottom of the bubbles with white gel pen.
Cut out glazed fish and mounted in on to tag using 3D foam pads.
Cut length of ribbon  folded it half and threaded it through the hole from the front then tied a bow with the "tails"
 
Stamps used Water effects 1
Sea creatures 1
 
Tag 2
 
 Ok I just had to do a Christmas themed tag.
 
Tag made as before.
 
I roughly divided this in thirds. Top two thirds of the tag I covered with a generous layer of distress crackle paint the clear rock crystal. The bottom third I applied a generous layer of gesso and used a artists trowel to apply the gesso to create "snow drifts". I left it to dry overnight.
I went over the entire piece with Tumbled Glass distress ink pad and Broken china around the edge.
Now we have a rough surface we cant stamp on it. So I stamped on tissue paper the two tress, with Versafine onyx black, ripped them out with hands gently and used 3d crystal glaze to attach trees to tag above the snow drifts. I covered the whole of the top including trees with a coat of the 3d glaze to make sure it was really sealed and stuck. again left it to dry.
 
Once dry I went over the bottoms of the trees and snow drifts with a glue pen and fine glitter.
 
The Deer was die cut from the Spellbinders " Frost Forms" then ran through again to emboss. Went over the antlers and rump with Metallic Lustre "Gold Rush" I used 3d foam pads and attached to tag
 
The poinsettia was Stamped, with Versamark ink pad, wow super fine silver embossing powder and heat set,  using Heartfelt Creations Christmas Poinsettia then used the heartfelt creation Sun kissed fleur to cut out poinsettia. Layered the poinsettia and attached to tag
 
Ribbon as before and you can just about see the loop at the back of the tag.
 
Tag 3
 
Ok my favourite.
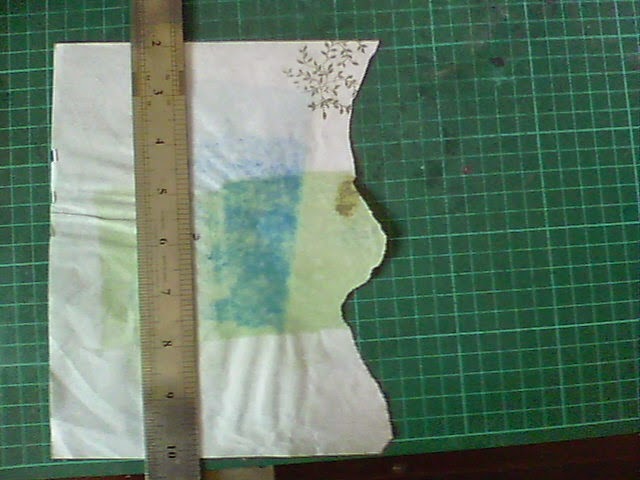
The tag is a bit of a whopper. Measuring 10.5cm x 21cm
that's 4 1/8" x 8 3/8".
For this tag I wanted certain elements to go on hence the size.
To do the tag cut the card with the measurements given above and again punch with gift bag punch board.
I then embossed with the Anna Griffin "foundery" embossing folder
While you have your machine out, die cut two of the Heart shape dies (from the Raindrops on roses die set) with the scrolls, and the Chateau Gate both by Heartfelt Creations.
Die cut some flowers as well, I used the Classic Sunflower Stamp with matching die, both by Heartfelt Creations.
Om a separate piece of card in Momento Tuxedo Black stamp the Mallards from the Heartfelt Creations Waters Edge Stamp set. 
Here you can see a close up of the finished picture. Basically I masked of the mallards and water and reeds. In case you wondering I used Art mask fluid as you can paint it on hence why I was able to mask the fiddly bits. Put a small round post it to act as the sun and put on the horizon. I then brayered the sky using Adirondack Stonewashed. Remove sun mask and colour sun using Sunshine Yellow again by Adirondack.
I removed the rest of the mask and coloured everything using Alcohol Pens.
I then carefully trimmed to fit the Window without any thing peeking from the sides and top.

I then gathered all my die cut bits(apart from the flowers) and in this order, Antique Linen, Vintage Photo, Walnut Stain, over all the bits including the main background of the tag that has been embossed.
Again using the photo as a guide and using 3d foam pads stick the elements to the tag.
Colour the flowers I used yellow and orange and browns for the centre. Using a mouse mat embossing tool and a water

mister shape your flowers. Attach to the tag as shown using some glue.
I would like to thank Martine for showing me how to do flowers ... Thank you.

Well folks that's my tags I hope you like them and have given you some inspiration.

Again thanks peeps for dropping by and that's my blog hop done and I hope you have enjoyed it.

Hugs

Andy xx

Friday 22 August 2014

Wanda


Hello Peeps

Thanks for dropping by. Yes I have another card for you today. This is a card I did with my stamping group earlier in then year. I said we are doing a landscape well it's underwater.

The stamps I used are from a Canadian lady called Ryn Tanaka. I was introduced to her stamps by a lady here in Plymouth called Bernie. I then went online and saw what Ryn did and ordered some of her stamps. The ladies in my stamping group were impressed as well so I ordered a whole batch and this is what I came up with using Ryn's stamps, and the consequent workshop.


So above you can see the picture of the finished card. What impresses me is the bubbles coming from the fish (yea and she is called Wanda)  by a little tinkering you can make it 3D. Here's how to do the card.

So you will need:

Basic craft kit
White Card measuring 10x19cm (7 1/2" x 4")
Distress inks in Mowed Lawn, Salty Ocean, Broken China.
Distress Markers:  Scattered straw, mustard seed, squeezed Lemonade.
Post-it-note
Wanda fish Stamp
Coral Stamp (also from Ryn Tanaka)
Black Dye based ink
Versafine in Majestic Blue and Onyx black
Some makeup sponges
Non-stick craft mat/splodge mat.
White gel pen
Silver gel Pen
mask with holes (will explain later)


So to do the card:

Gather your ink pads and sponges I used cut'n'dry, but its up to what you use. The piece of white 10x19cm (7 1/2" x 4") card. and you post it note. and the two Versafine ink pads.


Mount the fish on to a acrylic block and ink up with the Versafine. Onyx black ink pad.


Stamp the fish on the white card roughly about two thirds down if you want to be precise the nose of the fish is 6cm from the bottom of the card.


Next you want to stamp the fish on to a post-it -note to create a mask. Notice how I have angled the stamp so as to get the maximum sticky on the mask.
Cut it out.


Place the sticky over the fish on the card. Make sure its firmly in place.


Lay down your craft sheet/splodge mat.
Next gather your distress inks and sponges and start applying ink to the white area of the card.


You want to mix the blue and the green as in the photo. Do this all over the card. You might want to with the other hand press down on the post-it note so as to make sure no ink goes on the fish.


Sorry its a bit blurry. But you can see that the whole white area has been covered with the distress inks and have achieved a nice depth of colour.


Now we are going to but some coral in the back ground. With the post-it-note still in place ink up the largest of the coral stamps in the Versafine Majestic blue.


Lay some scrap paper underneath if you want, then stamp the coral over the fish. You might want to do this 2-3 times. as you can see from the photo, I came in from the sides as well.


Once you are happy with the coral, you can now remove the mask. The coral will look as though its behind the fish.


Next I got my three distress markers and coloured in the fish.
You can colour the line in the fins with the silver gel pen if you wish.


So the fish is all nicely coloured in and we can now add a bit more detail to the background.


As you can I have now my mask with holes in. and Salty Ocean distress ink pad, and a make-up sponge.


Partially lay the mask over the card as shown and dab with the ink pad making sure you do go through the holes.


Repeat for the other side and you have a nice
subtle background.


So here I have gathered the things I need to stamp in the bubbles emerging from the fish
Black dye based ink pad, Bubbles stamp and white gel pen.

So begin by inking up the stamp with the black ink pad.


Stamp it as close to the fish mouth as possible and at an angle use the photo as a guide.


So with the gel pen colour in the top and the bottom of the bubbles.


As you can see I have done the ones emerging from the fish , now I just need to do the rest.


Now all the bubbles are gelled and it really does make them pop.


So the finished card . I mounted the art work on to silver miri card then on to my 8"x 8" card.
Job Done

Thank fro dropping by and hope you have enjoyed the tutorial.
Andy xx


Monday 18 August 2014

Landscape 2

Hello Peeps

Firstly many apologies for not blogging for a while , all I can say is where has the time gone, August already and some of us already have started on our Christmas cards.

So todays card that I want to show you is a landscape  using some ink pad colours that you might not normally associate with doing landscapes.


So above you can see a picture of the finished card, so a bit of brayering stamping  with a combination of these two elements you can produce a lovely scenic card.

So here's what you need.

Basic tool kit
Non-stick craft mat/splodge mat
brayer (should in your basic tool bag)
Adirondacks dye based ink pads in the following colours, Sunshine Yellow, Red Pepper, Cranberry, Eggplant, Citrus.
Versafine in Olympia green/ Onyx Black
Tree Stamps,
Flight of birds stamp
foliage or grass stamp ( all these stamps are on the Inkylicious flight of dreams set of stamps.)
copy paper
8” x 8” white card blank
Plain white card
green/purple card for matting and layering
Circle punch approx. 5cm or 2” diameter

So how's it done.

Assemble your ink pads, your brayer and a piece of white card to measure 5 1/2" x 7 1/2/ " this is where we are going to do the landscape on.


Punch a whole using the punch into a piece of scrap card. Place the "aperture about 2cm or 1/2"  from the top of the card. Working with the short sides at the top and bottom.


Ink up the brayer using the Sunshine Yellow. Remove excess on to a splodge mat.


Working from of the card as shown as you roll the brayer gradually bring it down across the sun it will gradually go yellow repeat with the red pepper ink pad until you have a nice orage sun but not to bright. Don't clean the brayer.


With the ink that's left on the brayer roll back and forth across the top of the card again gradually bringing it towards the sun . Don't worry if you go over the sun as the ink on the brayer is minimal so wont make a difference  to the sun.


With a piece of scrap paper and a ruler tear the paper moving the ruler to create some hills.


So hope fully you will have  something like this. It does take practice.


Lay it on top of the card covering the sun it should be about half way down.


Ink up the brayer with cranberry, go over the torn paper, as shown in the photo.


Move the paper slightly as in the photo, and without re-inking the brayer go over the torn paper again. This will appear fainter and make it look as though the "hills" are further away.


Now move the torn paper to the other side and again without re-inking the brayer do another set of "hills".


So this is what we should have up to now.
Clean the brayer


Ink the brayer up with Citrus, and going from the bottom up towards the cranberry fill in the white area it will get fainter as you get towards the cranberry , that's fine. Clean Brayer


Lastly put the torn piece of paper back in place and ink up the brayer with eggplant. Again go over, move paper and go over again to make further hills in the distance. Clean brayer, splodge mat and put away.


So this is what we should have up to now. Now we will stamp in our details.


I'm using Inkylicious flight of dreams stamp set. and a onyx black Versafine ink pad.


Using the two small trees ink up with the black stamp it once on to scrap paper then on to your work, do this twice as shown in the photo.


Using the bigger tree ink up, and stamp in the middle of the picture near the bottom using the photo as a guide.
Ink the tree up again and using the edge of the stamp, stamp in the bottom corners of the picture.
Ink up the foliage stamp with Olympia green and stamp over the sun at the top of the picture stamp again without re-inking to get a fainter image. Repeat this all the way along.


Finally add the flight of birds blotting on to scrap paper first using the onyx black. Mount on to card of your colour choice and then on to a 8"x8" card blank.


The finished card.


Thanks for dropping by and hopefully wont leave it quite so long.

Andy xx