Tuesday, 28 May 2013

Art Masking Fluid

Hello Peeps

I'm going to show you how to do a background using masking fluid.

The masking fluid itself is good for all water based products and can be applied using a paintbrush. The great thing about using masking fluid is no matter how detail the stamp you can still mask it

For this particular tutorial I used Stampin up "The Open Sea stamp set, with father's day coming up I thought it might be good way to start .

Here's how to do the card.

You will need

Stampin up Stamp set: the open sea Product code: 123032 for the clear set

                                                                                 123030 for the wood mounted set

Apothecary Accents die set  product code: 127 003

Stampin up soft suede ink pad product code 126 978

You can purchase the above products from the link below.

http://www.stampinup.net/esuite/home/craftyandy17/

Dayler Rowney Art Mask Fluid

Acrylic Block

Cream Card approx. 19 x 13 cm

Ink Blending tool

String

ok lets do the card

 Here as you can see I've started getting my things ready for the project, masking fluid, block paintbrush, ink pad and stamps.
 Here as you can see I have mounted the anchor, world and compass stamps  on to the acrylic block. Using the stampin up soft suede ink up the stamps and stamp onto the cream card.
 Here I have stamped the card with the images. if you have space left just fill up with the two smaller stamps , doing them individually might be easier at this stage.
Once you happy then we can mask them.
 Shake the masking fluid. I recommend here using an old paintbrush or getting a cheap kiddies one. So basically don't use good ones.
 Apply the masking fluid to the stamped images.
 So here I have painted the masking fluid all over my images.
 From the open sea mount the "Ledger Stamp"  and ink up wwith the soft suede.
 We now need to start tamping over the images completely covering the card.
 Here you can see a close up of the ledger stamp over the world image.
 One completed stamped background. At this stage go and have a tea or coffee while the whole thing dries about 5 minutes
 If you really are impatient then blot with a kitchen paper towel
 With your finger gradually rub the masking stuff from the stamped image and completely remove from the card. It should be a bit elastically and rubbery. Remove all the masking from the stamped images.
 So here I have removed all the masks.
 A close up of the images after mask removed. As you can see particularly the compass there is no hint of the ledger stamp it looks as though its behind the compass which is what we wanted to achieve.
With the same ink pad we are just going to give the edges a worn and distressed look. I find it easier to do this using either a splodge mat or non-stick craft mat.
 ink up your blending tool and starting from the outside gradually bring the tool in towards the card edge thus slightly discolouring the card.
 Here you can see the half that I have done giving the outside of the card a slight aged look which is what we are trying to achieve here.
 Place a piece of kitchen towel under you fingers to help prevent paw prints appearing on your card.
 One completed background.
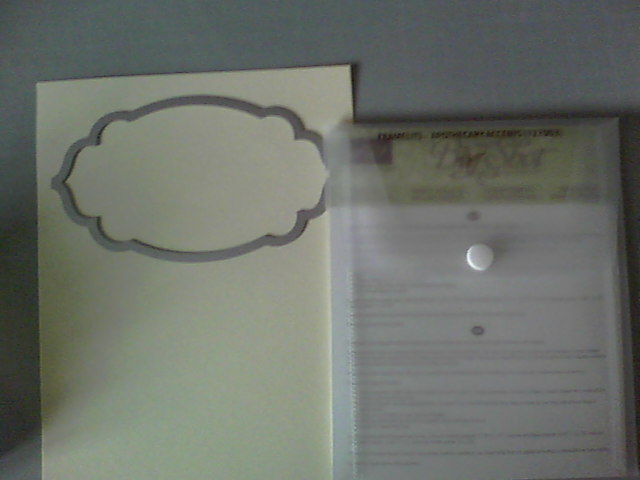
 Select the die from the apothecary accents and run it through your die cutting machine. I used the same card as for the background.

 Stamp the ship in the middle of the shape. Blend the edges of the shape as before.
Mat and layer the background on to another piece of card and go around all four edges with Double Sided Sticky Tape.

Tie a reef knot ( left over right and right over left) . Leave long enough tails to go around the card to the back, and have it towards the left side of the card.
Here you can see the tails on the wrong side, fix them to the double sided tape.
Attach the background to the front of an  A5 card blank.

Job Done

Enjoy..

Wednesday, 8 May 2013

Mica Stamping

Hello Peeps

Hope you are all well. Today I'm going to show you how to stamp using mica powders. Now the thing is here the technique I'm going to show you will end up producing two colours of mica powder on the same card.


 So above you can see the finished background. The mica powder does not show up all that well but trust me its there.

You will need.
Stamps I used the sailing boat from "The Open Sea" set from Stampin up.
Selection of distress inks: I used Antique linen, Tea Dye
Perfect Pearls Mica powder in Rust and Perfect Gold
Cut and dry foam
A6 piece of card stock
Versamark ink pad.
Baby wipes.

Begin by applying the Antique linen to the piece of white card. making sure its covering the card. Random here is good and you don't have to be all that particular. Apply tea dye distress ink in the same way


This is what you want to end up with a card covered in the ink and saturated.
 

Next with your perfect gold mica powder cover the WHOLE of the card with the powder.


Now get your baby wipes, second colour mica powder (here I used rust), stamp and Versamark.
resting your stamp on the work surface take your ink pad to the pad and lightly tap to apply some ink to the stamp.
Starting up in the left hand corner press firmly and remove immediately clean the stamp and dry it.


Apply a small amount of mica powder to the stamped image and move it around with the brush to cover the whole of the image.
Repeat this over the card, stamp, clean, mica, stamp, clean, mica.
 
 This is what you should end up with a nice background with two different mica powders on it.

Enjoy.x


Wednesday, 24 April 2013

Madaleine topper

Hello Peeps


Ok here I'm going to show you how to do the topper. If you scroll down you will get instructions on the background.


 Here's what you will need

Adirondack pitch black dye based ink pad
Clear embossing powder
Selection of Promarkers.
Plain white card.
Versafine ink pad.
Large Madeleine Stamp by Clarity stamps.
Begin by stamping with black ink pad on to the white card.
 Colour with a selection of Alcohol based Promarkers.
 Cut out the image
 Cover image with a good coating of clear ink and lay down on copy paper. Sprinkle with clear embossing powder and heat set.
Repeat this process with ink and embossing powder twice more.
You should end up with a clear smooth glaze over the image.


Here is the finished topper, matt and layer onto a piece of pink card and attach to card as shown in picture.

Background distressing

Hello Peeps
Sorry for the long delay in my post but have been so busy.

So here todays project is a card I did with my stamping group last Saturday. I showed how with using stamps how to create their own custom made background papers, followed glazing a stamped image that has been coloured in using Promarkers.


 Ok above then you can see the finished card yeah ok its a bit pink HELLO.

So a nice stamped background with a nice glazed topper.

Hers what you need to make the card.

Basic tool kit.
Distress inks I used in the sample above Worn lipstick, Tattered Rose, Spun Sugar.
Madeleine Stamp by Clarity Stamps
What is this life poem stamp by Clarity Stamps
Swallowtail Stamp by Stampin up.
Plain White Card.
Tim Holtz Idea-ology masks "borderline"
Versafine Satin Red


As you can see I have started to accumulate all the stuff I will need for this project. Ignore the Adirondack pitch black that comes later.

Beginning with the three distress inks apply to the white card random is good here so don't be to fussy. By the time all the stuff is on you aren't going to notice it.


This is what you are aiming for so again don't to fussy here.
 Just a good coverage of the inks in a random manner is good here.


Next take your verse stamp and ink it up with the Versafine Satin red. As you can see I blotted it first before stamping on the project as I did not want it to be glaringly staring at me, subtle here is the key.
Do this all over.


Next get your chosen mask and lay on top of the card. Her I used the wide border from Tim Holtz Idea-ology mask borderlines set.
With the mask in place go over again with the distress inks but not to much. Gently lift the mask to see how things are progressing is it needs more ink add some.
As you can see from this picture this is what you are aiming for. Subtle but there.


 Next get a water based pen here I used a distress marker in worn lipstick to highlight one edge of the stencil. This makes it ping and gives it a slight 3d affect. Do this all the way down.
 As you can see I have completed the pen marks all the way down


Lastly get a nice stamp and ink up with the Versafine Satin Red. The stamp I used here is the Swallowtail from Stampin up. You can also use a flourish to go from corner to corner. that is nice also.


So here I have stamped it half on the page half of the page. I did not blot either it was inked and stamped straight onto project.
Background completed.


Wednesday, 27 February 2013

Lamdscape

Hello Bloggers

Today I'm going to show you how to create a landscape using one ink pad, a few stamps and some torn paper. It's a card I taught my stamping class , I promised therefore that I would post instructions so they can refer to it for future reference.

I would like to thank Barbara Grey of Clarity stamps for all her inspiration she has given me over the years.

Things you will need:

Splodge Matt (available from Claritystamps see link below.)
Encaustic art card.A5 size with 3cm trimmed from a short edge and long edge.I do this so I know I will have "space" to matt and layer and mount on to a A5 card.
Brayer,  I use a speedball as I find this the best.
Selection of stamps, I've used A big tree, small tree, Balloon's, and flock of birds.All my stamps are from Clarity.Link here. http://shop.claritystamp.co.uk/
Copy paper
Adirondack Earthtones dye based ink pad:Meadow.
Small punch to cut mask from post it. I used a x-cut punch. This produces a 2.3 cm circle for my sun.
Masking tape
Ruler.

Here is a picture of the finished card. Matt and layered ready to use.


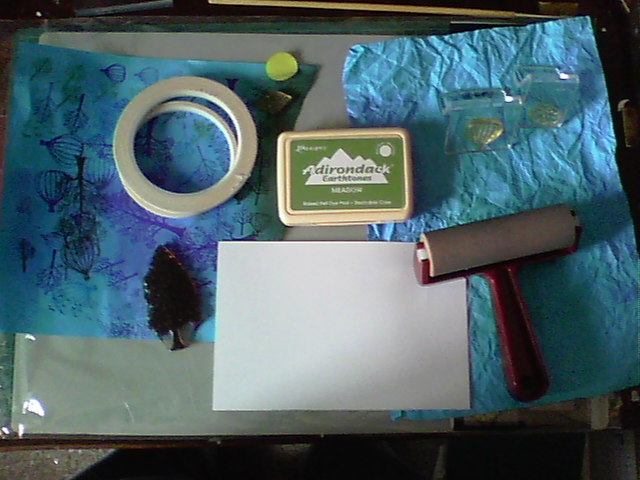
Here I begun to assemble all my things I will need to do the card


 I now have my card and trimmed to the required size.
 
 Tear of a piece of masking tape and adhere to your clothes a few times to remove excess sticky. Attach to the card covering about a 1cm edge of the card. .Do this to all 4 sides as in the photo.


Roll you brayer over the ink pad giving the brayer a good coating.
Roll your brayer over the splodge mat to evenly distribute the ink over the mat.
 
 Get a piece of copy or scarp paper and scrunch it up into a tight ball then un-scrunch it and flatten it out. Roll your prayer along the "ripples" the impressions will be left on the brayer.
 
 Covering the top part of the picture, so you have about 2.5cm of the bottom exposed run your brayer along the exposed part of your picture creating the lake.  You might need to add a bit of pressure to get the effect.Clean brayer.


Take the piece of paper covering the top part, and put it back down so its now covering the water. You want it so there is a thin line of water exposed.
 
 Here you can see a close up of the covered water with just the top exposed.


To create the "hills" I find the easiest way is to use a ruler and tear the paper along the edge of the ruler . Moving the ruler creates the hills and vallys. Practise a few times until you are happy with your hills.


I now have my hills. Once you are happy with them keep them and use it a few times and make loads of cards.


I now attach my hill mask and after re-inking my brayer ink in my first hills. By moving the mask slightly and WITHOUTre-inking brayer you can do another hill which would appear to be in the distance.


Leaving the water still covered and the hill's now in place I now punch my sun and place it in the "sky "area of my picture.


I have now re-inked my brayer and have actually done a wheelie on the left hand side of the brayer. I now roll back and forth across the picture gradually bringing the brayer down towards the hills.


As you can now see from this photo the sky is darker at the top and gets lighter towards the hills. This is because of the wheelie that you did, and this is what you are trying to achieve.


OK we have got to this stage, with the mask removed. What we need to do now is put in the piece of land at the front of the picture to give it some depth.


Retrieving your hill mask cover up the bottom left of you picture and go across it with your brayer. Be careful not to go across the other bit of the lake. You might want to do this a few times as you want it relatively dark but don't go overboard. re-ink brayer if necessary.


I now have my piece of land in the foreground. See the bit of green to the right of the piece of land in the water, that was with the brayer and I did not cover up the water sufficiently,  you have been warned lol. Now we are going to stamp in the details.


Using the photo as a guide, ink up your small tree stamp and blot it on a piece of scrap paper. the secret here is as it in the distance you want it quite faint, so blot it twice and then stamp on the picture. Without re-inking invert the stamp and stamp in the water so you get e reflection do this twice more using the photo as a guide.


Now ink up your balloon stamp and blot it once on the scrap paper and stamp twice on the picture using the photo as a guide. The second stamped balloon will appear fainter , you want this as it gives the illusion of being further away. Thus automatically adding depth to the art work.


 Now ink up the flock of birds and stamp twice on to scrap paper and then stamp on the picture in the middle of the sun. Again the fainter the better so again you might want to press a little harder to get a good impression
Now ink up the larger of the balloons and stamp once on to scrap paper and stamp on to your artwork..
 Do the same for the big tree, using the photo as a guide.


Ink up the big tree again and using the very edge of the stamp add some foliage to the bottom left corner where the big tree is., being careful not go over into the water.


The finished piece matt and layered and attached to card.

Enjoy

Andy xx